David Edwards


Creating NFTs involves using specialized platforms that enable users to generate and upload their artwork onto a blockchain. In this guide, we will show you the process of simplifying NFT creation with AI tools for NFT minting. You’ll learn the step-by-step process to create your first non-fungible token, including uploading your artwork, selecting the appropriate blockchain, and determining where to list it for potential sale. Follow our guide for easy NFT minting in 2024.
Over the past few years, non-fungible tokens (NFTs) have gained immense popularity within the cryptocurrency realm. These unique digital assets have seen billions of dollars in trading volume and have garnered significant attention from celebrities, thrusting digital artwork into the limelight of mainstream media outlets.
Related: Discover how to create NFT in just 6 easiest steps!
Step 1. Create an Image with AI
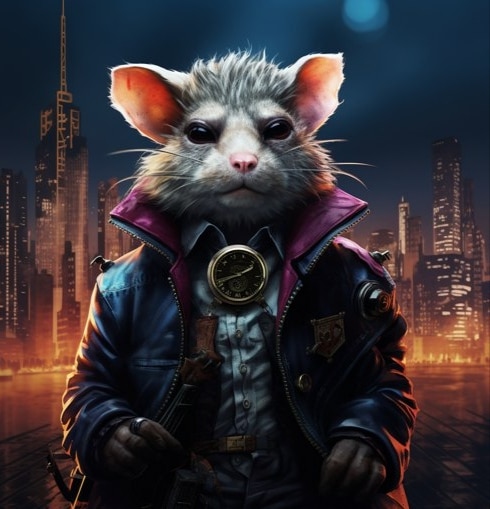
Now, let’s create a picture for your NFT. You can either design it yourself or use AI tools for NFT minting to generate it: Midjourney, Gencraft, AIGreeam or other. Creating a picture on all sites is very similar. You need to give a description of the picture you want to get and choose a style (Cartoon, Anime, Cyberpunk).
We used Midjourney and this description to create our picture:”The villain is a hamster in a costume against the backdrop of the city. In a dark atmosphere”
Step 2. Create Wallet
Wallets are applications that let you securely store your cryptocurrencies and any non-fungible tokens (NFTs) you mint or purchase.
To set up a wallet, follow these steps: First, download your preferred cryptocurrency wallet app. Then, create a username and password to secure your wallet. Make sure to store your private keys and recovery phrase offline to keep them safe and ensure you can back up your wallet. Simplifying NFT creation starts with having a secure and reliable wallet.
Related: How to Create a MetaMask Wallet in 2024?
Step 3. Choose a platform to sell your NFT on
OpenSea
Many platforms are available for selling non-fungible tokens across various blockchains. It’s challenging to cover them all in a single guide or determine the best one for your project. You need to explore and assess different platforms to find the one that best fits your unique needs.
OpenSea has emerged as the leading and most popular NFT platform to date. Since its establishment in 2017, it has facilitated over $20 billion in trading volume and showcases more than 2 million NFT collections. OpenSea primarily focuses on Ethereum-based non-fungible tokens.
In July 2022, OpenSea expanded its support to include Solana non-fungible tokens, broadening its offerings to cater to the Solana blockchain ecosystem.
Solanart
Solanart is a prominent non-fungible token platform specifically designed for Solana-based NFTs. It hosts a variety of highly regarded Solana NFT collections and boasts a user-friendly interface, making the minting process straightforward and accessible.
Several cryptocurrency exchanges, including Binance Exchange, support NFT creation. These platforms allow users to directly create their non-fungible tokens, select their preferred blockchain, and seamlessly mint the NFT within the exchange environment.
In this case we will use Rarible. It is an Ethereum-based platform.
Step 4. Create the NFT
1. Connect your wallet
After you’ve got your wallet set up, you’ll want to connect it with the NFT marketplace you plan on using. OpenSea and Rarible make this easy — clicking the Create button in the top left prompts you to connect your wallet. You’ll then be presented with a list of compatible wallets, and choosing yours will prompt you to go through the connection process.
2. Choose a Blockchain
Various blockchains have the capability to store your non-fungible tokens securely. It is vital to select the most suitable blockchain that meets your specific needs as it will maintain a permanent record of your NFT.
- Solana has emerged as a prominent blockchain for NFTs, positioning itself as a strong contender alongside Ethereum and Cardano. It has seen a notable surge in popularity among NFT creators. Many are flocking to this blockchain to mint their NFTs. Despite being a recent addition to the non-fungible token landscape, Solana has successfully attracted renowned NFT projects. These include Degenerate Ape Academy, Solana Monkey, SolPunks, Frakt, Bold Badgers, and Sollamas.
- Ethereum holds a significant advantage in the non-fungible tokens market because it was the first blockchain to support them. It has established itself as the leading blockchain for NFT initiatives and remains at the forefront of blockchain technology. Ethereum uses two popular native tokens: ERC-721 for creating non-fungible tokens (NFTs) and ERC-1155 for creating semi-fungible tokens. This innovative approach has contributed to Ethereum’s widespread adoption and prominence within the NFT ecosystem.
- Tezos, a decentralized and open-source blockchain, provides a seamless environment for peer-to-peer transactions. It has become a solid foundation for aspiring NFT artists looking to mint non-fungible tokens, mainly because of its cost-effective transaction fees. The Tezos blockchain has also established specific rules and standards for non-fungible tokens in response to their growing popularity. Tezos has three token standards, but only the FA2 standard is explicitly designed for minting non-fungible tokens on the platform.
3. Listing an NFT
When you start minting an NFT on Rarible, the first question you’ll encounter is about choosing the blockchain for your NFT. Rarible offers several options, including Ethereum, Flow, Tezos, and Polygon. Unlike OpenSea, Rarible does not cover the fees for using the Polygon blockchain. So, if you choose Polygon, you’ll need to pay the necessary fees for minting or selling your NFT. For this example, we’ll use Ethereum as the selected blockchain on Rarible.
After selecting ‘single’ on Rarible, you’ll reach the NFT creation screen. First, upload the digital file you want to sell as an NFT by clicking the ‘Choose File’ button. In this scenario, let’s assume we will list our NFT on Rarible for a fixed price.
Setting the Price and Currency
Enter the desired price into the corresponding field. You can also select the currency you want to receive as payment, although potential buyers can make offers in different currencies. Remember, Rarible charges a 2.5 percent fee if your NFT sells.
Choosing Your Collection and Minting Options
The next two options let you choose your collection (we’ll go with Rarible Singles for our example) and the Free Minting option, which allows you to use Rarible’s lazy minting system.
Naming and Describing Your NFT
Give your NFT a name and, if desired, a description. Finally, choose the royalty percentage, which determines how much of each subsequent sale goes back to you. For example, if someone buys your NFT for 0.2 ETH and sells it for 1 ETH in the future, you’ll receive 10 percent (0.1 ETH) of that sale.
Final Review
Before finalizing the process, carefully review all the details. Modifying certain aspects later can be costly or impossible, so exercise caution and thoroughness. Once you are confident that your NFT is ready to be published, click the “Create Item” button.
Completing the Creation
After granting the necessary wallet requests and a brief waiting period, you will receive a notification stating that your NFT has been successfully created. Click the “View NFT” button to access and inspect your newly created NFT. To view your collection, navigate to your profile picture in the top right corner and click on “My Profile” to explore and manage your NFTs.
With these steps, you have successfully created and listed your NFT. By simplifying NFT creation with AI tools for NFT minting, the process becomes efficient and straightforward. Utilizing AI tools not only streamlines the creation process but also enhances the quality of your NFTs. Embrace these advanced technologies for a seamless NFT minting experience in 2024.